Home View Basics
Overview
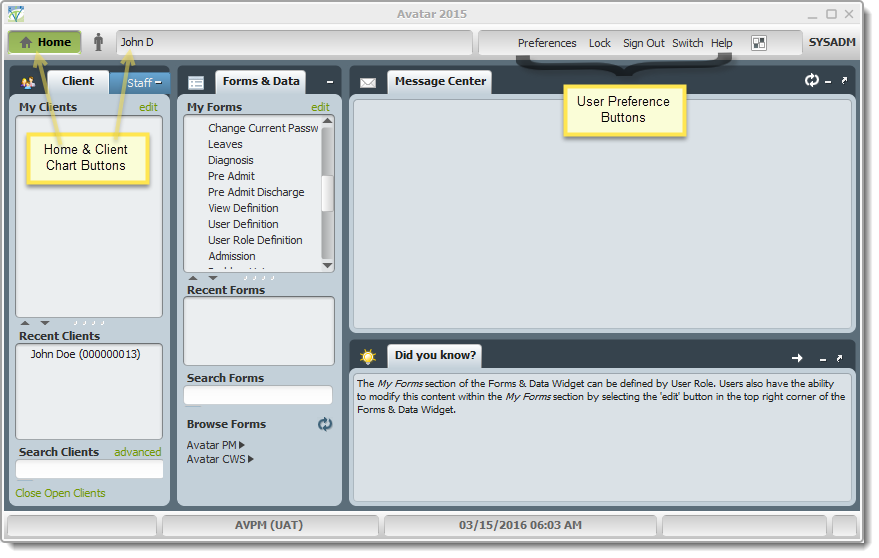
The Avatar Home View is the first screen accessed when logging in. It is the base for navigating to any individual record or form, changing preferences, locking the user session, and logging out.
Applicable Staff
All Avatar users may access the Home View. User Role determines which options are available and the layout of the screen.
Usage
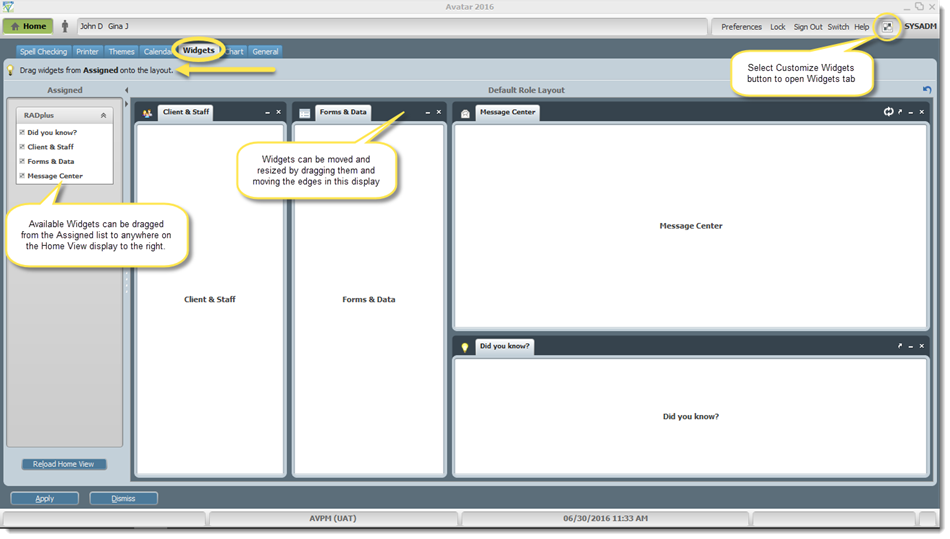
The Home View opens as represented below. The default view shows information arranged in widgets for Client/Staff access, Forms & Data available, the Message Center, and a widget to view automatically generated tips. These widgets can be modified by each user according to rules set by the administrator.
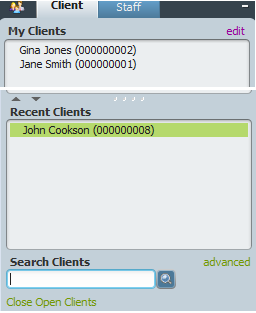
The Client/Staff widget allows access to any staff member that is assigned to your group or the facility (depending on your user level) or any currently admitted clients. Any individuals that have been added to My Clients by the user will be displayed there for ease of access in the current session. Individuals that have been added to the staff caseload during the admissions process or by assigning the Attending Practitioner will always be available here.
Any recently viewed clients will appear in the Recent Clients section for the current session. Clients can be searched by Last Name in the Search Clients field at the bottom of the section. The same functionality appears in the Staff tab. Double-click the desired name to open the record. Searching for clients is covered in detail in the article "Client Lookup". Client Look Up
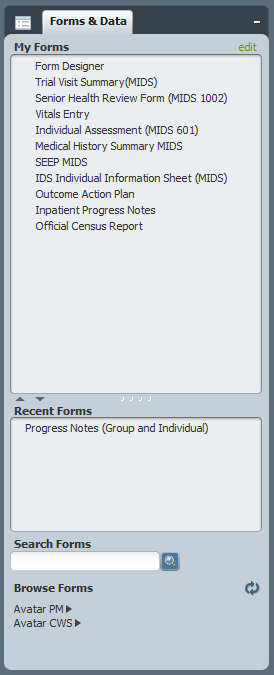
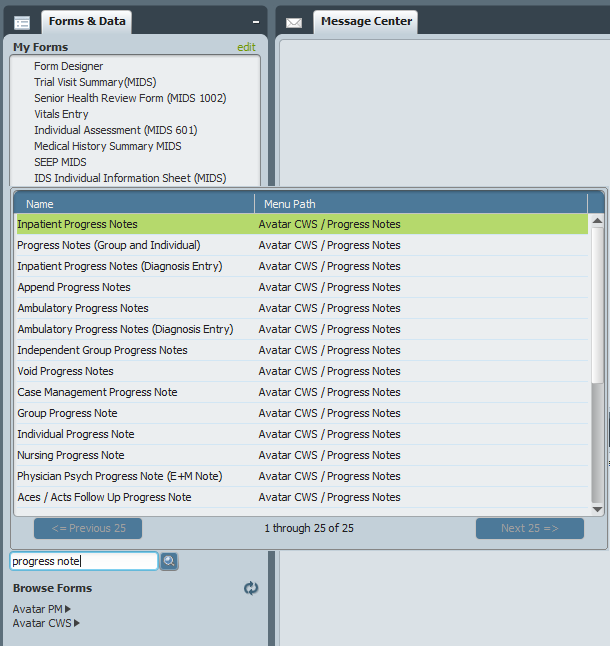
The Forms & Data widget shows forms that have been added to My Forms, Recent Forms that have been viewed, and a field to search for forms by name or type. Double-click a form name if it appears in one of the lists to open. When using the Search Forms field, a live search screen appears as you type. Double-click the form name to select and open. Using forms is discussed in detail in the "Using Forms" article here. Using a Form
The upper row of buttons allows switching between any open client records and customizing the user experience. Any open records will be shown by name next to the Person icon ![]() at the top left. Switch between client records and the Home View by clicking the appropriate buttons.
at the top left. Switch between client records and the Home View by clicking the appropriate buttons.
![]()
User preferences can be adjusted by the top buttons on the right side of the screen.
![]()
- Preferences - Opens a screen to allow adjustment of Spell Check options, Printer selection, Themes (colors), adding personal Calendar data to the Avatar calendar, Widgets (which will be discussed separately in another section), and Charts.
- Lock - Allows locking the system without logging out. User will be prompted to enter System Code, Username, and Password to enter system.
- Sign Out - Safely signs out user. A warning will appear if data in open forms will be lost.
- Switch allows logging out of the current code and opening another, such as closing UAT and logging into Live. NOTE - Only the LIVE system is to be used to enter client data, and is the only system code that will be used regularly.
- Help topics for Avatar.
-
Customize Widgets - Used to display information, including Staff/Clients, Forms/Data, Messages, etc. Views can be modified to include required widgets and to remove others. Widgets are used to open/view/enter/interact with data in Avatar. Widgets can be added/removed using the Customize Widgets function in either the Home View or Chart View.
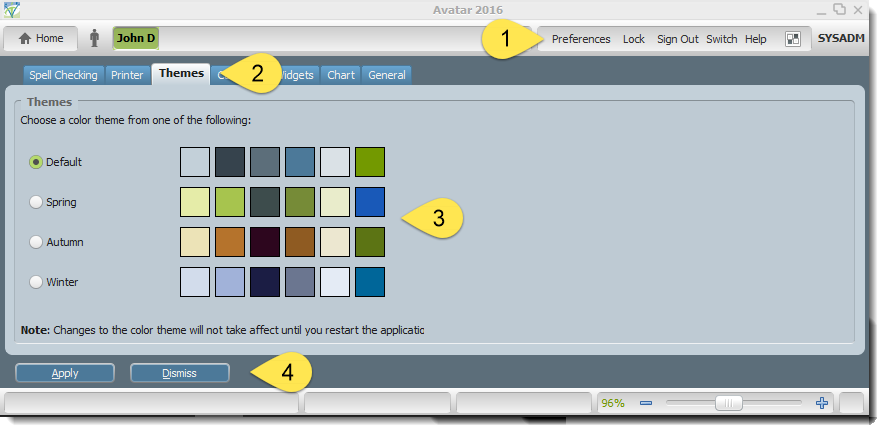
The Theme can be changed to use different colors for fields in most screens. To adjust Preferences, click the Preferences link at the top of the Home View screen, then select the Themes tab on the left. Select the color scheme you would like to use, then click Apply. The changes will take effect after Avatar is restarted (log out and close all Avatar windows, including web browser).
The following image shows a new Theme along with instructions to enable the Color Blind option. Click Preferences, then General. Select the check box to enable Color Blind View, then click Apply.
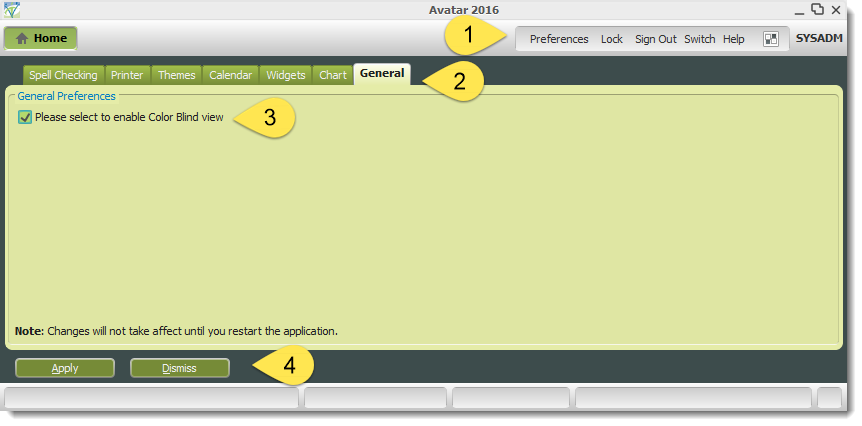
The changes will take effect after Avatar is restarted (log out and close all Avatar windows, including web browser). The color blind option will display all required fields that are usually red as Bold text.
Tips & FAQ
Use the Lock feature when you wish to leave the system open but will not be present to avoid unauthorized use. It saves time by allowing the user to remain logged in and retains any users added to My Clients, Recent Clients, and Recent Forms for the session.
Add commonly used forms to your My Forms view to prevent having to search for them. They will always remain in this section after logging out.
Technical Information
N/A
